
16/03/2023
By Imran M
By Imran M
In the world of software development, the ability to quickly and reliably deploy code changes is crucial. This is where Continuous Integration/Continuous Deployment (CI/CD) pipelines come in. A CI/CD pipeline is a set of automated processes that allow developers to quickly build, test, and deploy code changes to production environments. This post explains the steps required how to Setup CI-CD Pipeline in AWS.
Prerequisites:
Before we dive into the process of creating a CI/CD pipeline in AWS, there are a few prerequisites that must be met:
Step 1: Set up a Code repository
To create a CI/CD pipeline in AWS, you must first set up a code repository to store your code. AWS supports several popular code repositories, including GitHub, Bitbucket, and AWS CodeCommit. Once you have set up a code repository, you can commit your code changes to the repository.
Step 2: Set up a Build Environment
To build your code, you must set up a build environment. AWS CodeBuild is a fully managed build service that compiles source code, runs tests, and produces software packages that are ready to deploy. CodeBuild can be used with a variety of programming languages, build tools, and deployment targets.
To set up a CodeBuild project, you must specify the following:
Step 3: Set up a Deployment Target
Once your code has been built, you must deploy it to a target environment. AWS supports several deployment targets, including EC2 instances, Elastic Beanstalk environments, and ECS clusters.
To deploy your code, you must specify the following:
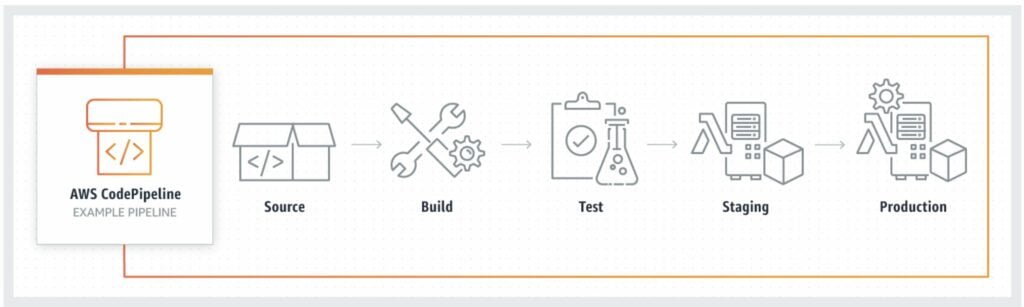
Step 4: Set up a Deployment Pipeline
To automate the process of building and deploying your code, you must set up a deployment pipeline. AWS provides several services that can be used to set up a deployment pipeline, including AWS CodePipeline and AWS CodeDeploy.
To set up a deployment pipeline, you must specify the following:
Creating a CI/CD pipeline in AWS can seem daunting at first, but it is an essential step in improving your software development process. By automating the process of building and deploying your code, you can increase the speed and reliability of your deployments, which ultimately leads to a better end-user experience. With AWS CodePipeline, CodeBuild, and CodeDeploy, you can create a robust and reliable CI/CD
