
21/03/2022
By Imran M
By Imran M
MongoDB is a popular NoSQL database system that is used by many companies around the world. It offers a flexible and scalable solution for modern applications. Its popularity stems from its ability to handle large datasets, support complex data structures and provide high performance. However, the installation process can sometimes be daunting, especially for those new to the platform.
MongoDB’s popularity can be attributed to several key factors:
Scalability: MongoDB’s distributed architecture allows it to scale horizontally, handling increasing workloads by adding more servers to the cluster.
Flexibility: MongoDB’s schema-less design provides flexibility in storing and querying data, making it well-suited for rapidly evolving applications.
Performance: MongoDB’s indexing and query optimization techniques enable efficient data retrieval and manipulation, even for large datasets.
Rich Feature Set: MongoDB offers a wide range of features, including aggregation pipelines, full-text search, and geospatial queries, to support complex data analysis and visualization.
Installation is not straightforward like other packages and at times users have to face errors while troubleshooting. To help those who get stuck, I have prepared this post so that the steps are straightforward and easily implementable without encountering errors. In this post, we will explain how to Install MongoDB6 Ubuntu LTS correctly.
The first step in installing MongoDB 6 is to add the MongoDB GPG key to your system. This key is used to verify the integrity of the packages that you will download later on.
To add the key, open a terminal and enter the following command:
wget -qO - https://www.mongodb.org/static/pgp/server-6.0.asc | gpg --dearmor | sudo tee /usr/share/keyrings/mongodb.gpg > /dev/null
This command downloads the MongoDB GPG key and adds it to your system’s keyring.
After adding the GPG key, the next step is to add the MongoDB repository to your system. This repository contains the packages that you need to install MongoDB 6.
To add the repository, enter the following command in the terminal:
echo "deb [ arch=amd64,arm64 signed-by=/usr/share/keyrings/mongodb.gpg ] https://repo.mongodb.org/apt/ubuntu jammy/mongodb-org/6.0 multiverse" | sudo tee /etc/apt/sources.list.d/mongodb-org-6.0.list
This command adds a new file called mongodb-org-6.0.list to the /etc/apt/sources.list.d directory. This file contains the repository information for MongoDB 6.
After adding the MongoDB repository, the next step is to update your system packages. This ensures that you have the latest package information and that any dependencies required for MongoDB 6 are installed.
To update your system packages, enter the following command in the terminal:
sudo apt update
This command updates your system packages and retrieves the package information for MongoDB 6.
Once you have updated your system packages, the final step is to install MongoDB 6. To do this, enter the following command in the terminal:
sudo apt install mongodb-org
This command installs the MongoDB server, client, and other related packages.
After installing MongoDB, you need to start the MongoDB service. This is required to start the MongoDB server and allow you to access the database.
To start the MongoDB service, enter the following command in the terminal:
sudo systemctl start mongod
This command starts the MongoDB service and allows you to use MongoDB.
To verify that MongoDB is installed correctly, you can use the mongo command. This command opens the MongoDB shell and allows you to interact with the database.
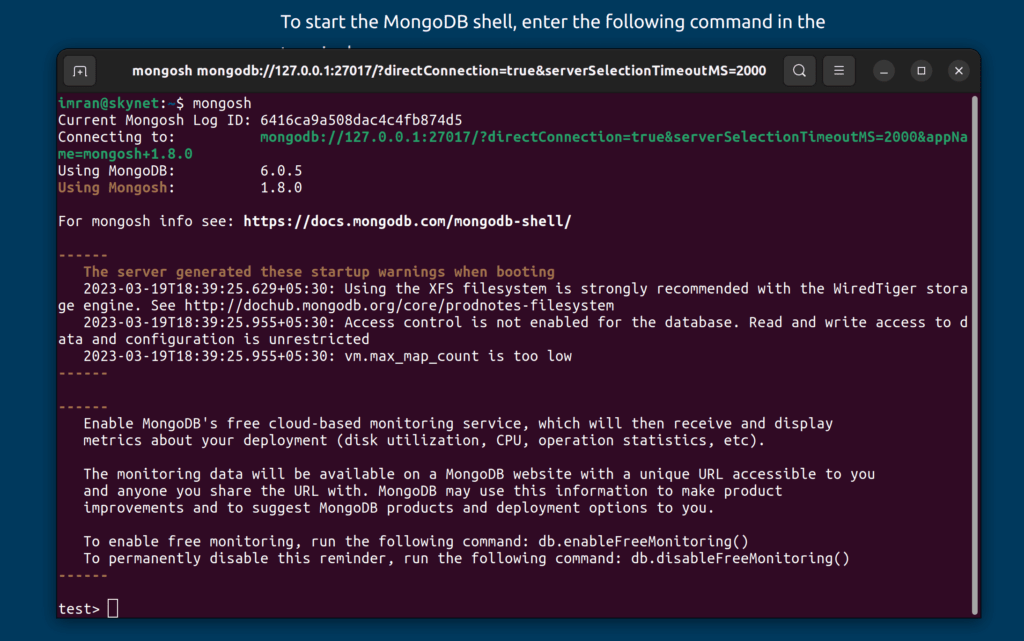
To start the MongoDB shell, enter the following command in the terminal:
mongo
This command opens the MongoDB shell and displays the MongoDB version information. To start working with the database, you can use the mongosh command.
By following these steps, you should be able to Install MongoDB6 in Ubuntu LTS and start using it in your projects. Remember to always keep your MongoDB installation up-to-date to ensure that you have the latest security patches and bug fixes.
